Services We automate your reporting and analytics end to end — Power BI, Tableau, web reports and a Telegram bot Explore services
Back to product

ETL Sync overview

What the program looks like and how to use it — from installation to daily reports in Telegram.

Dashboard: is everything OK
Step 1

Installation and first sign-in

Download the installer from this site and run it — it takes a couple of minutes. ETL Sync works like a regular program: its icon appears in the system tray and it starts with Windows. The web panel opens in your browser (http://localhost:8090 by default). First sign-in: login Admin, password admin — you will be asked to change it right away.

  • Language (Uzbek, Russian, English) and dark mode are switched in the top bar.
  • Without a key the program runs for free on the Start plan.
Step 2

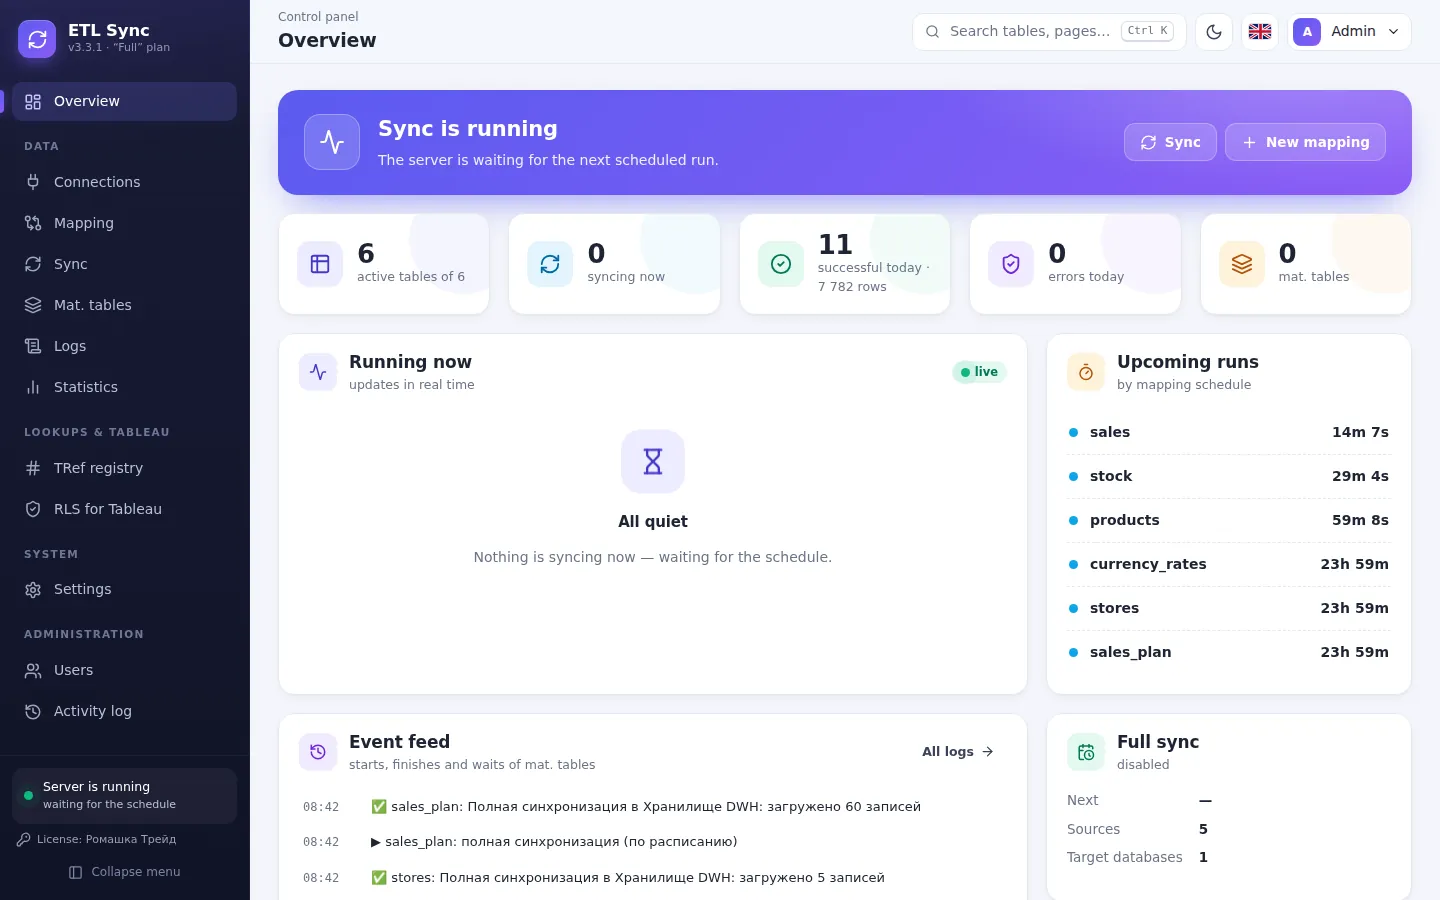
Dashboard: is everything OK

The home screen shows whether sync is running, how many tables were updated today, any errors, upcoming runs and a feed of recent events. Everything updates in real time.

Dashboard: is everything OK
Step 3

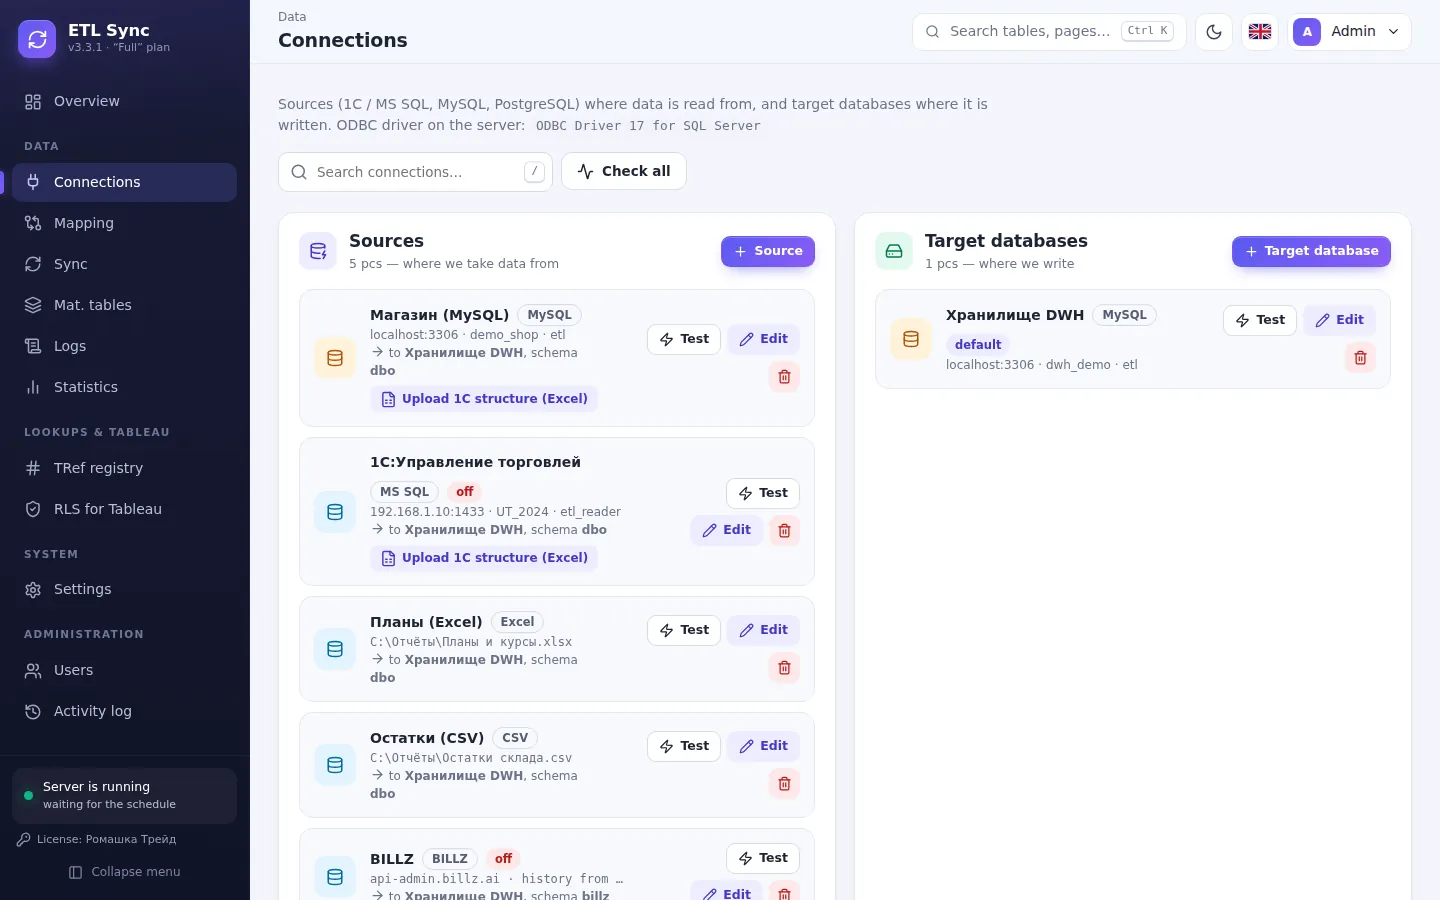
Connections: from where and to where

Sources are where data comes from: 1C databases and any MS SQL, MySQL, PostgreSQL, plus BILLZ, Google Sheets, Excel and CSV. The target database is your warehouse that Power BI and Tableau connect to. The “Test” button instantly checks the connection.

  • Passwords are stored encrypted.
  • For a 1C database the structure is read automatically: tables and fields get readable names right away.
Connections: from where and to where
Step 4

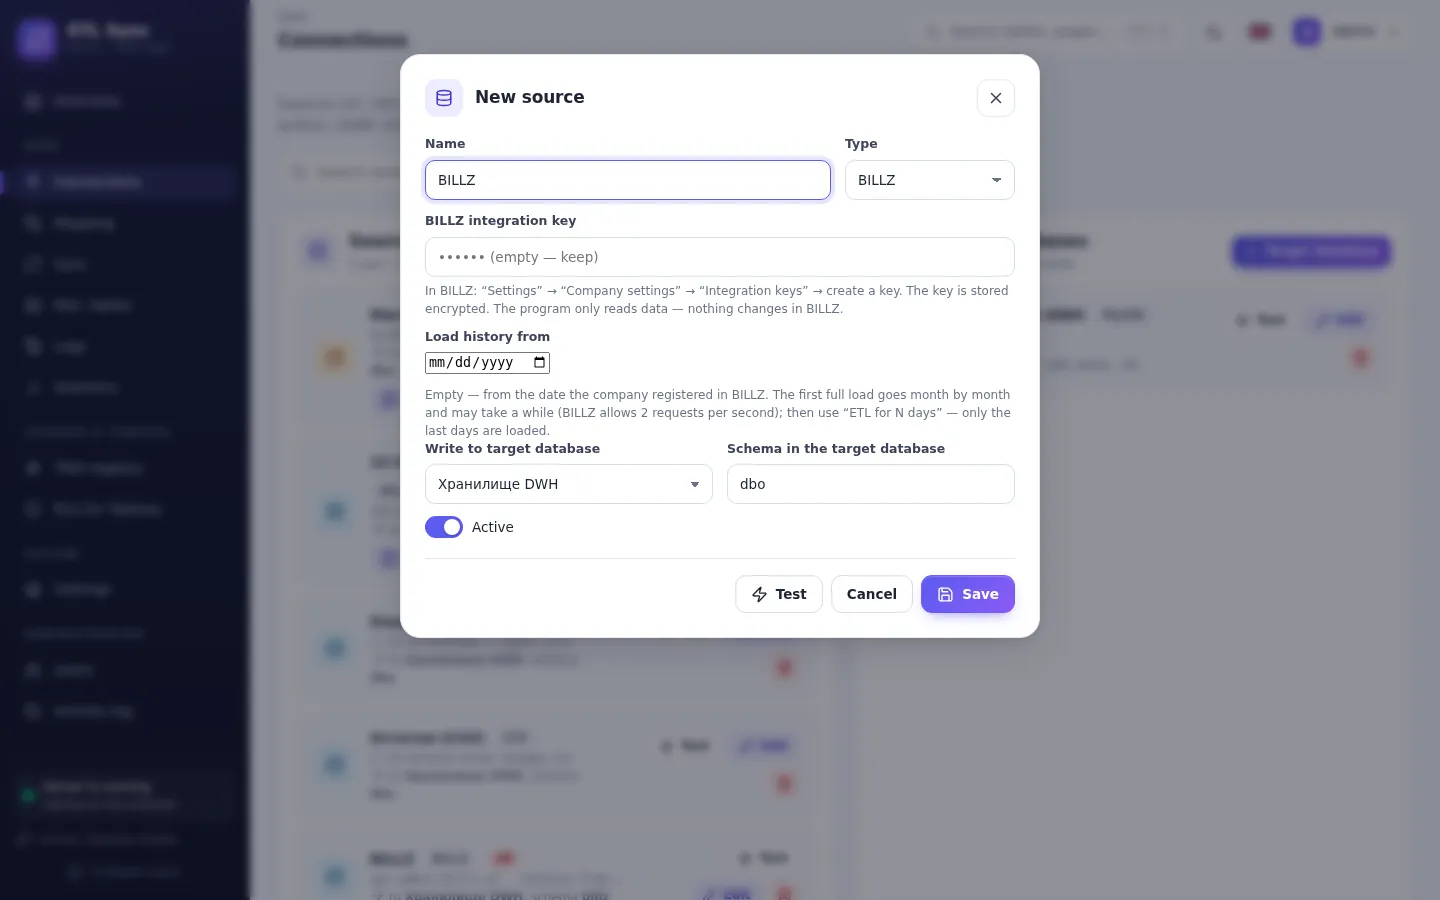
Connecting BILLZ

For BILLZ all you need is an integration key from your BILLZ company settings. The program loads stores, products, stock, sales and payments. The first load goes month by month through the whole history, then only recent days.

  • The program only reads data — nothing changes in BILLZ.
Connecting BILLZ
Step 5

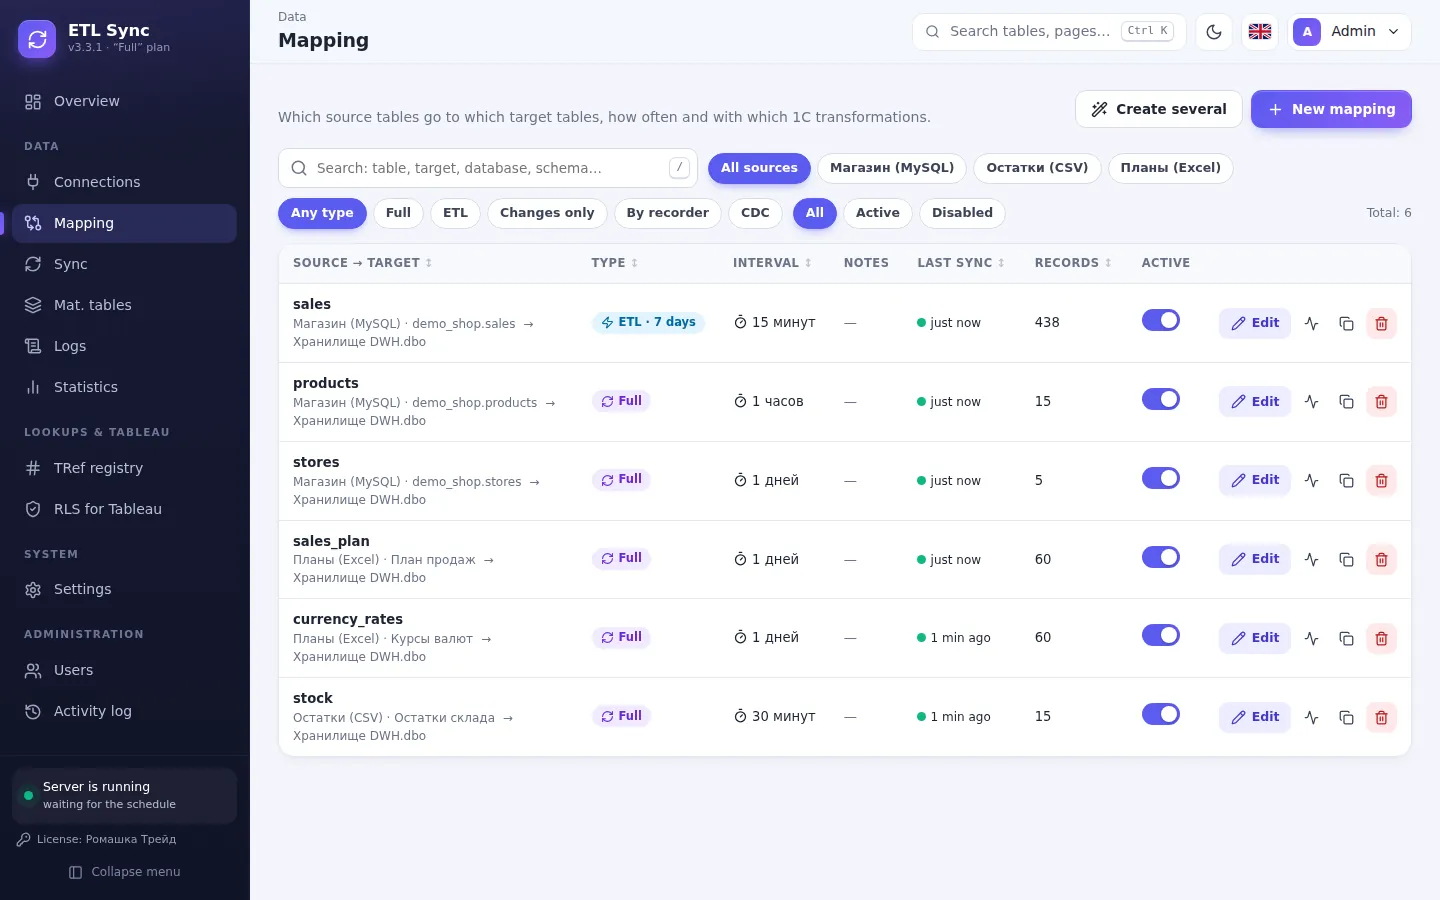
Mappings: which tables to move

A mapping is a rule “source table → warehouse table”. The list shows the mode, schedule, last sync time and row count. You can create many mappings at once from the 1C structure.

Mappings: which tables to move
Step 6

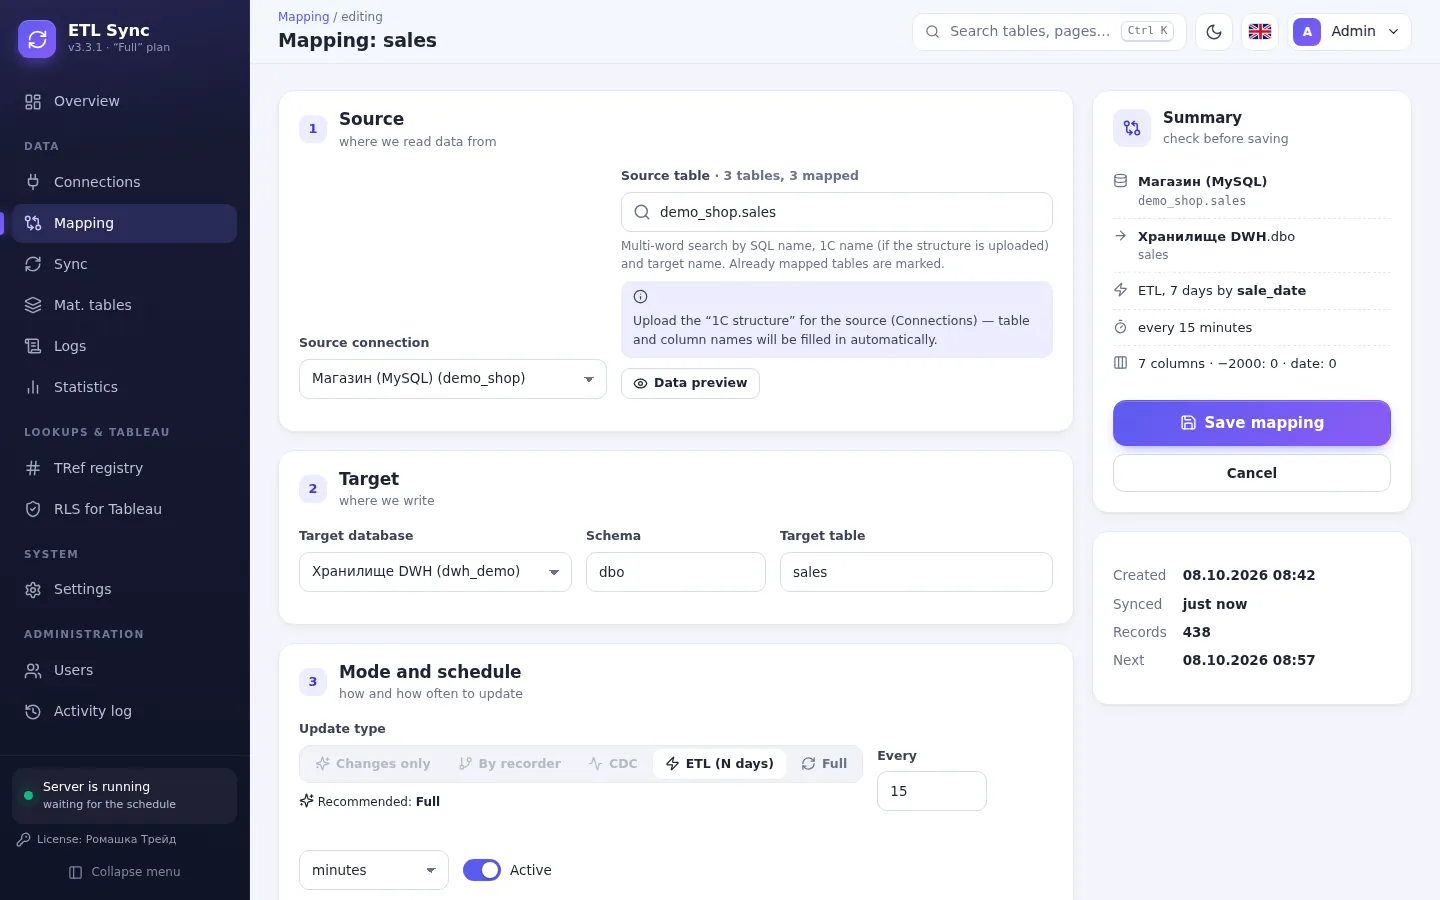
Setting up a mapping

Pick the source table, where to write it, the update mode and the schedule. For 1C tables the program suggests the best mode: “Changes only”, “By recorder”, CDC, “ETL for N days” or “Full”.

  • “Preview data” shows the first rows before any sync.
  • Full loads go through a staging table — reports never see empty data.
Setting up a mapping
Step 7

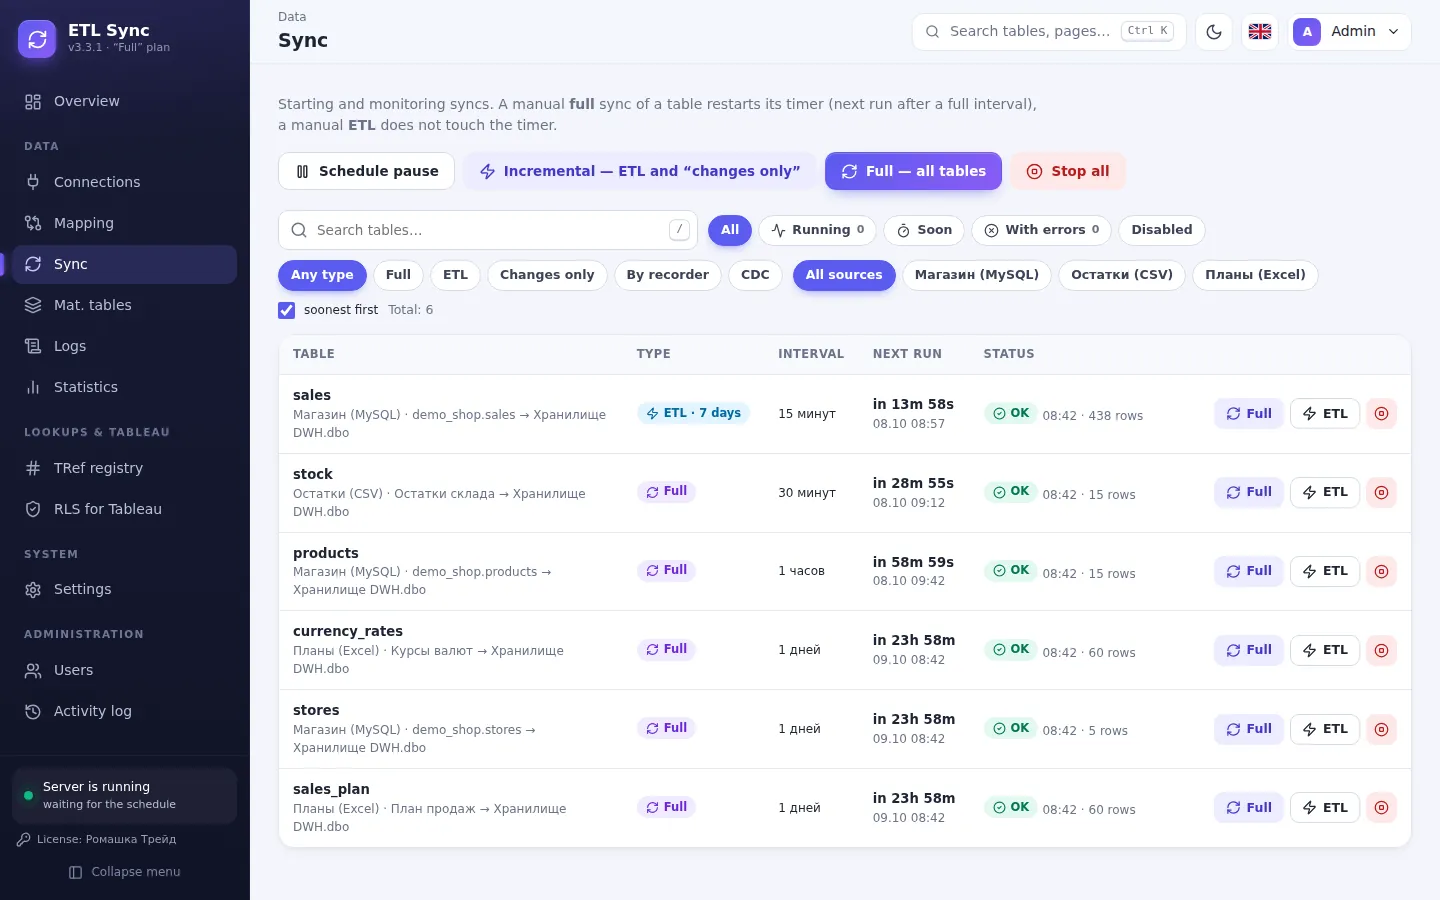
Synchronization

Tables update on schedule by themselves, but you can run any of them manually — one by one or all at once. You see progress, the queue and the result of every run. If the network drops, the program retries.

Synchronization
Step 8

Statistics

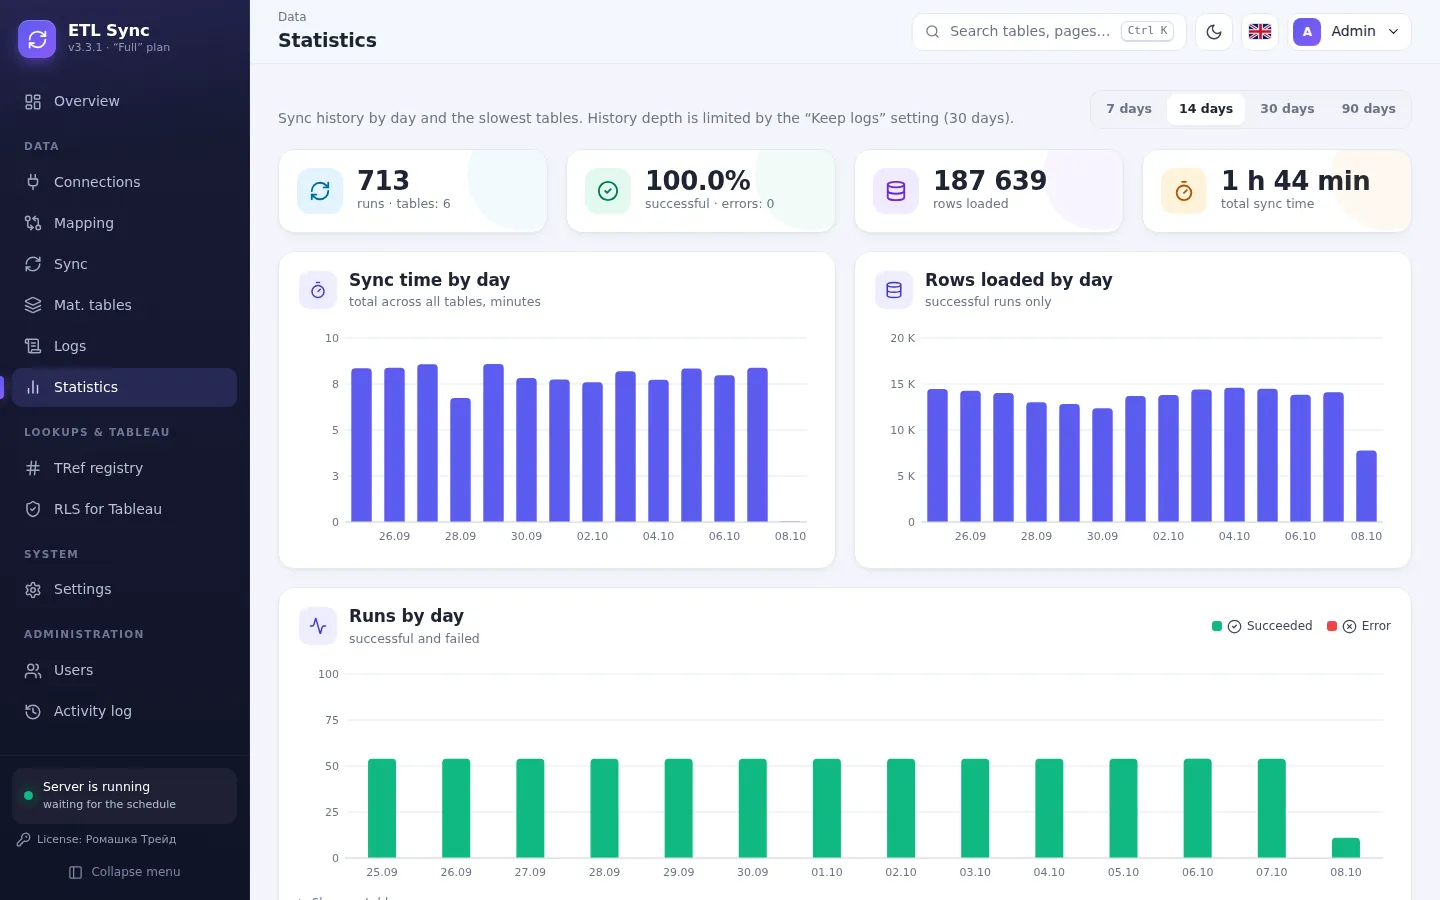
Daily history: how many runs, how many rows loaded, how long syncing took and which tables are the slowest. Handy for understanding load and spotting problem tables.

Statistics
Step 9

Logs

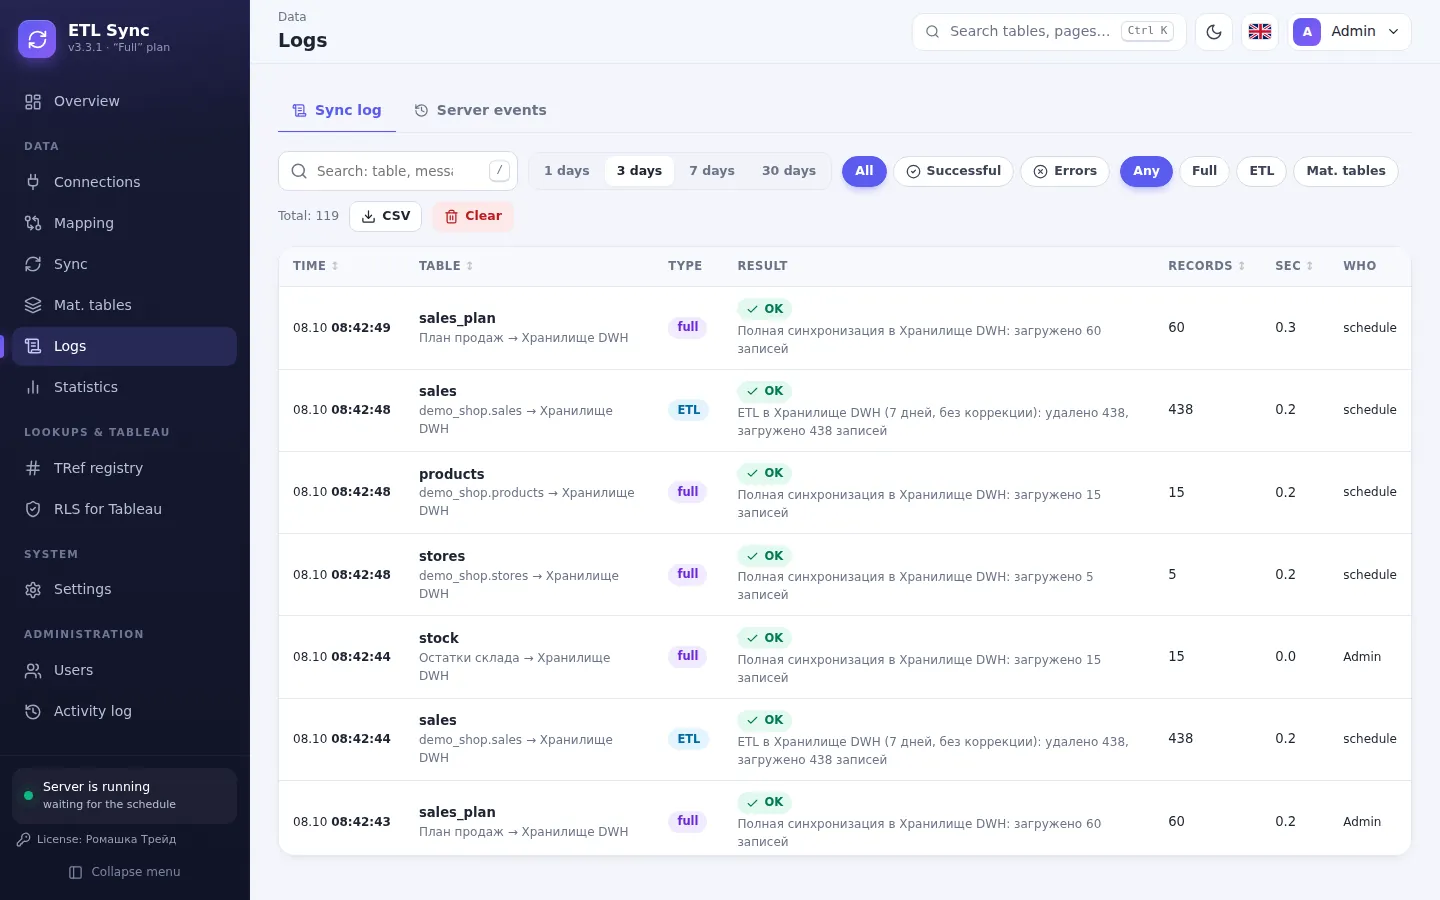
Every run is recorded: when, which table, how many rows, how long it took and how it ended. Errors and warnings are highlighted and easy to filter.

Logs
Step 10

Telegram: errors and a morning report

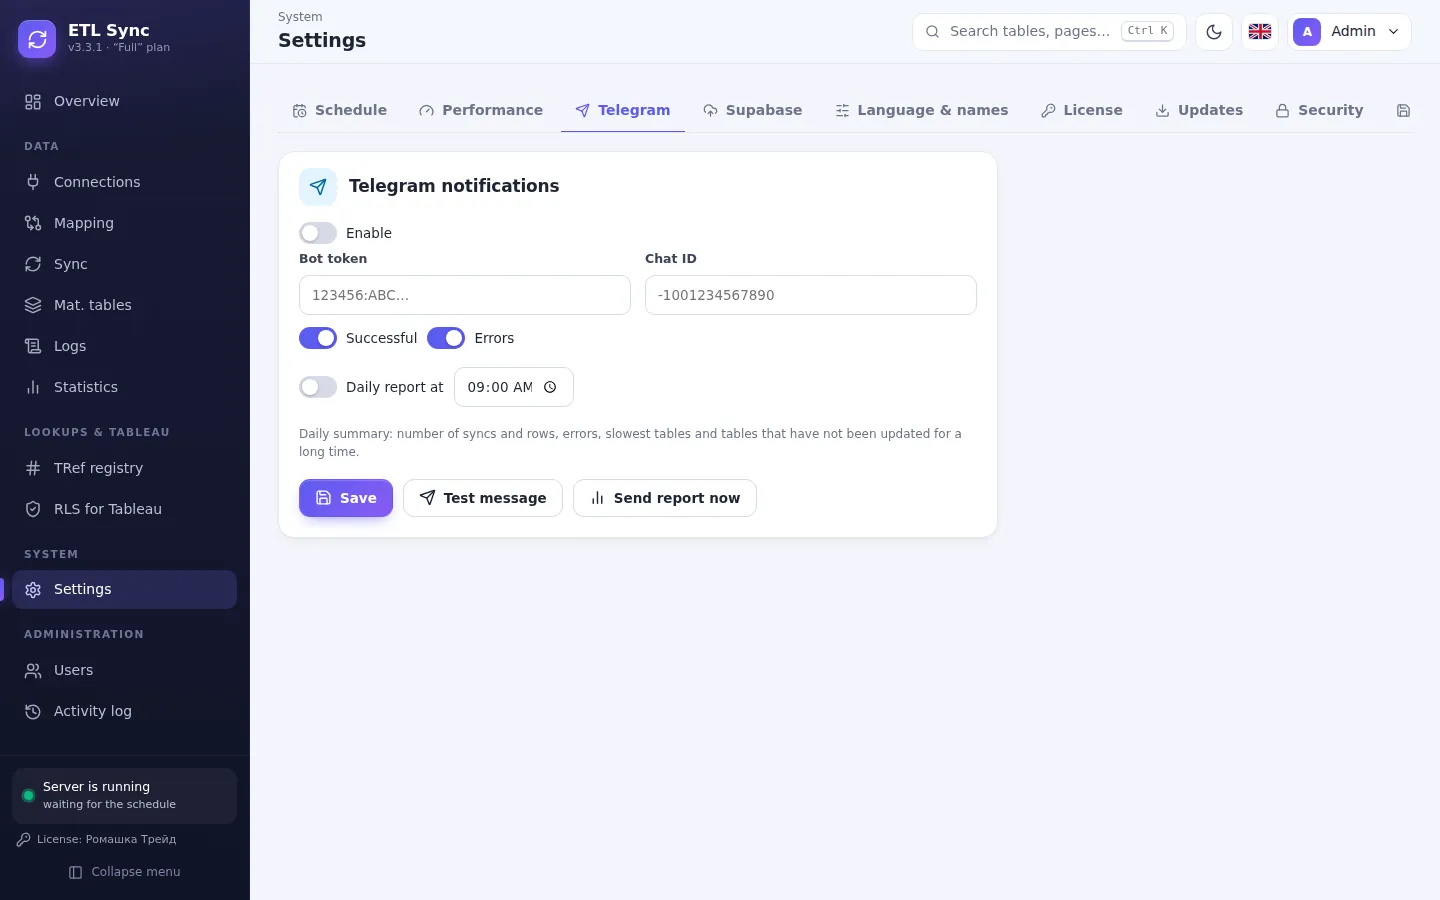
Connect a Telegram bot — the program reports errors instantly and sends a summary every morning: what was synced, how many rows and whether there were problems.

  • Available on the Premium and Full plans.
Telegram: errors and a morning report
Step 11

License

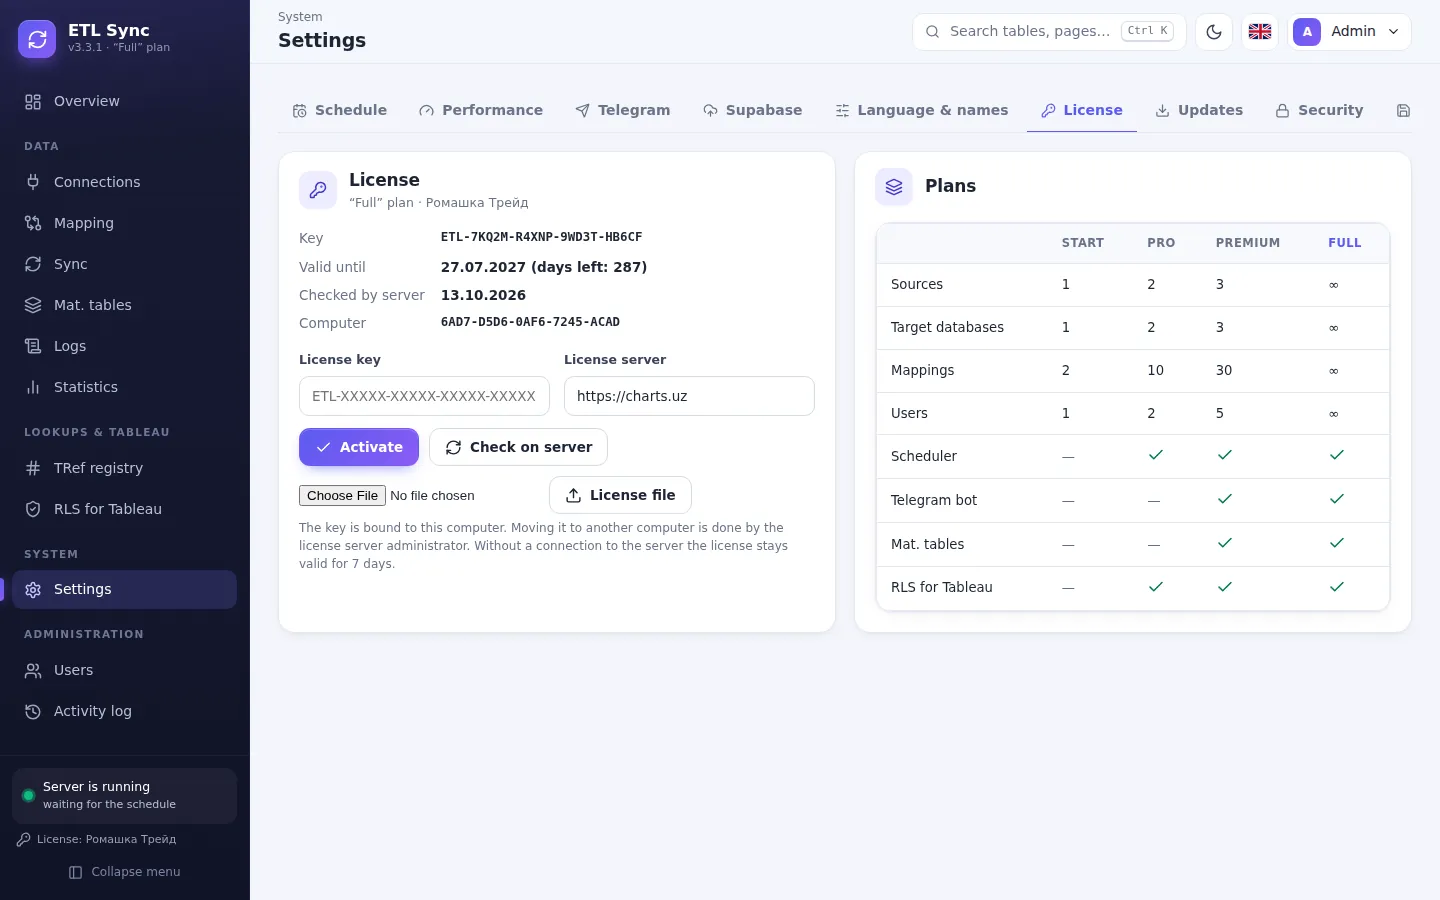
Buy a key in your account on this site and enter it in “Settings → License”. You also see the plan, expiry date and limits there. 7 days before expiry the program reminds you to renew.

  • One key — one computer. If the license ends, your data and settings are kept.
License

Try it on your own data

The Start plan is free. Download the program or leave a request — we will help you install and set it up.

Leave a request

We will call you back within a business day, show the program and help you install it.

Or message us
@finance_92 +998956600666

By sending, you agree to the processing of your contact details.